step 1
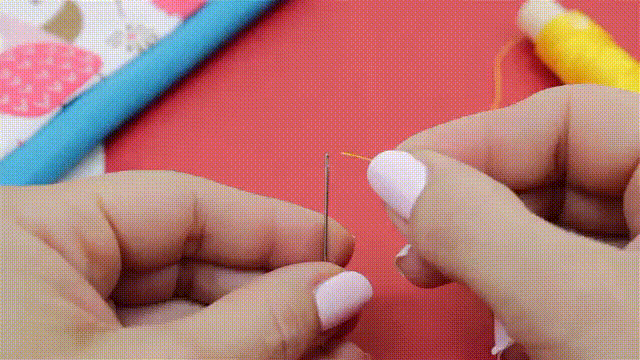
Thread your sewing needle and tie the ends of the thread together. When it comes to thread, more is better. Cut at least two times the amount of thread you think you’ll need just to be safe. Then, take one end of the thread between your thumb and forefinger and glide it through the eye of the needle. Guide the thread through the needle until the thread is even on both sides. Pinch the ends of the thread together and tie a small overhand knot at the end.
If you have trouble threading the needle, no worries! Look for sewing needles with larger eyes. These will make threading easier but leave bigger puncture holes. Sewing needles come in a variety of sizes, ranging from 8 to 19 to represent the needle’s gauge. The smaller the number, the larger the gauge and thicker the needle will be.[2] Cut the thread with sharp scissors to keep the ends from fraying. Lick the end of the thread, so it’s easier to glide through the needle’s eye.
step 2
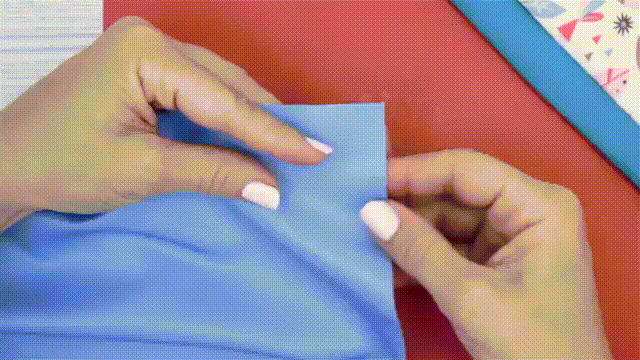
Pierce the needle through the side of the fabric people won’t see. This side of the fabric is often referred to as the “wrong side,” and is typically the inside part of a piece of clothing or stuffed toy.[3] For example, if you’re sewing a seam, turn the garment inside out so the “wrong side” is facing out. Poke the needle into the fabric on the far edge of where your stitch will start. Then, pull the needle and thread through until the thread’s knot hits the fabric.[4]
Use gentle pressure when poking and pulling the needle to avoid yanking the thread through the fabric. If your knot goes through the fabric, simply make a bigger knot and try again.
step 3
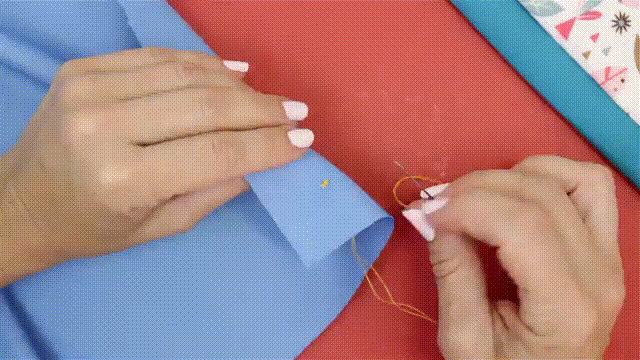
Guide the needle through the other side of the fabric. Flip your fabric over and pierce the needle through about a 1⁄4 in (0.64 cm) from where you poked the first hole, following a straight line. Pull the entire length of the thread through the fabric until you feel resistance—this is your first stitch.
Draw a line on your fabric with a pencil or fabric chalk or marker to use as a guide while you sew. Pull the thread tight enough for the stitch to lay flat on the fabric but not so tight that it bunches the fabric underneath. The bigger the space between your needle pokes, the longer your stitches will be.
step 4
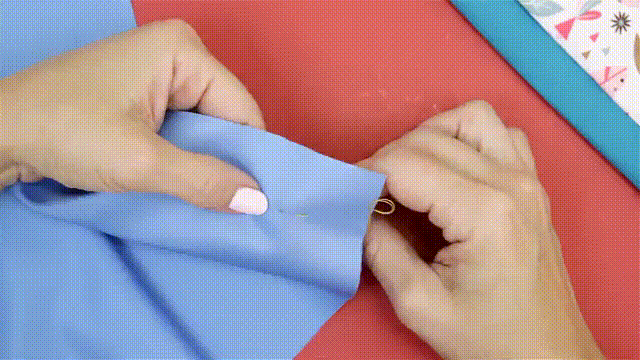
Continue stitching until you reach the end of the fabric. With each poke of the needle, turn the fabric over. Keep the same distance between stitches by poking the needle in and out with an equal space between each hole. Continue sewing till the end of the fabric or pattern.
A straight stitch is often called a running stitch because it continues in a straight line following a dashed-line pattern, similar to a running path.
step 5
Finish the stitching with a knot. Poke the needle through the wrong side of the fabric, but only pull the thread halfway through (this creates a loop of thread). Weave the needle up into the loop and pull snugly until the thread is flat against the fabric—you’ve successfully made a knot! Repeat this 2 to 3 times to ensure the knot stays in place.